Connect your AI assistant
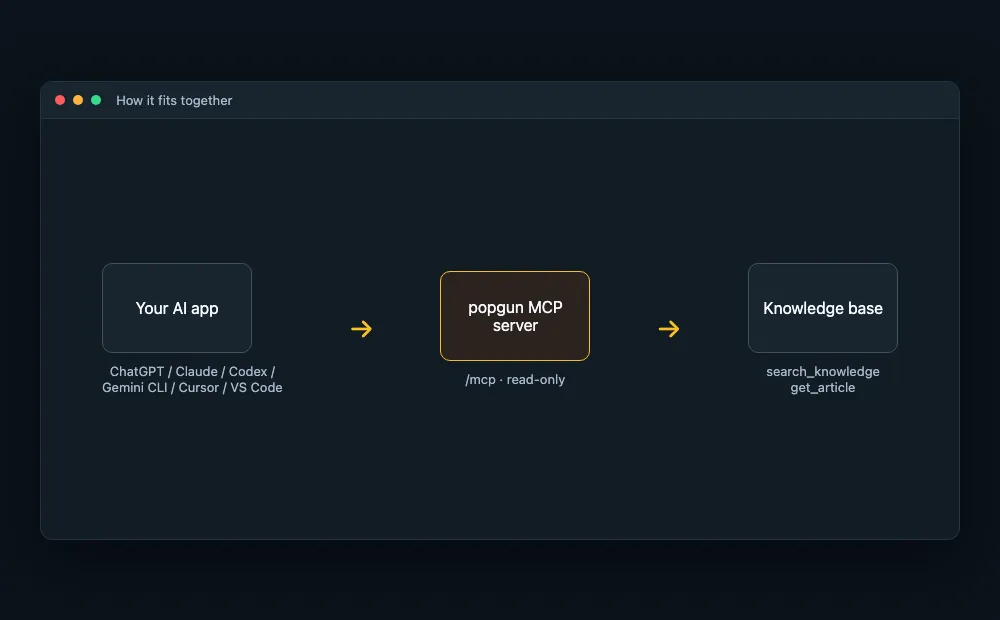
PopGun exposes a public MCP (Model Context Protocol) server. Connect your own ChatGPT, Claude, Codex, GitHub Copilot, Gemini, OpenCode, Hermes Agent, OpenClaw or IDE assistant and it can search the help articles and manage your game servers while you chat - sign in with your PopGun account once and approve access.
Your MCP endpoint
Read-only by default, rate limited per IP address and requires sign-in. Select the field above to copy the URL. Keep the URL out of automated scrapers; it is meant for interactive AI assistants.
Access levels
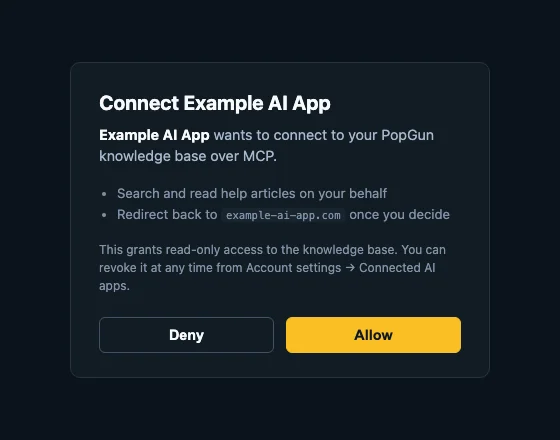
Every connected app gets read-only access by default. You can additionally allow changes for an app on the consent screen when you first connect it, and downgrade or revoke access at any time from Account > Connected AI apps.
Read-only (always granted):
search_knowledgeandget_article- search and read help articles.list_my_serversandget_server_status- list your servers and check their status.list_server_filesandread_server_file- browse and read server files (up to 256KB of text).get_server_settings,list_config_filesandread_config_file- read game settings and managed config files.list_tasks- list scheduled tasks (start, stop, restart or console command on a daily or weekly schedule).list_backups,get_backup_policyanddownload_backup- list backups, read the automatic backup policy and get a time-limited download link.get_server_addressandcheck_server_address- read the server address name and join addresses, and check whether an address name is available (Minecraft).list_instances- list a server's instances and the modpacks available for new instances.list_runtime_versions- list the runtime versions (for example Java) a server can run on, the default and the current one.list_packagesandget_package_operation- list available plugins or modpacks with their install state and check the progress of an install or uninstall.
Read and write (opt-in, checkbox on the consent screen):
start_server,stop_serverandrestart_server- control a server's power state.send_console_command- send a single command to a running server's console.write_server_fileanddelete_server_file- edit or remove server files (up to 256KB of text; managed files cannot be changed).update_server_settingsandsave_config_file- change game settings and managed config files.rename_server- rename a server.create_task,update_taskanddelete_task- schedule tasks, enable or disable them, and delete them (delete requires explicit confirmation).create_backup,restore_backup,delete_backupandset_backup_policy- manage backups (restore and delete require explicit confirmation).create_instance,install_modpack_instance,activate_instanceanddelete_instance- manage server instances (activate and delete require explicit confirmation).set_server_address- set, change or remove the server address name (removal requires explicit confirmation).set_runtime_version- change the runtime version (for example Java) of a stopped server; stop it first, then start it again to pull the new image (requires explicit confirmation).install_packageanduninstall_package- install, update or remove plugins and modpacks on a Minecraft server.
An app can never delete a server or touch billing through MCP, regardless of access level.
Signing in
The first time an AI app connects, it opens your browser to a PopGun login and consent screen. Log in (or use your existing session), tick the checkbox if you also want to allow changes, then approve the specific app - the app never sees your password, and you can downgrade it back to read-only or revoke it entirely at any time from Account > Connected AI apps.
Choose your client
Web app (chatgpt.com)
Requires a paid ChatGPT plan with Developer mode (Plus, Pro, Business, Enterprise or Edu). In Business and Enterprise workspaces an admin may need to allow it first.
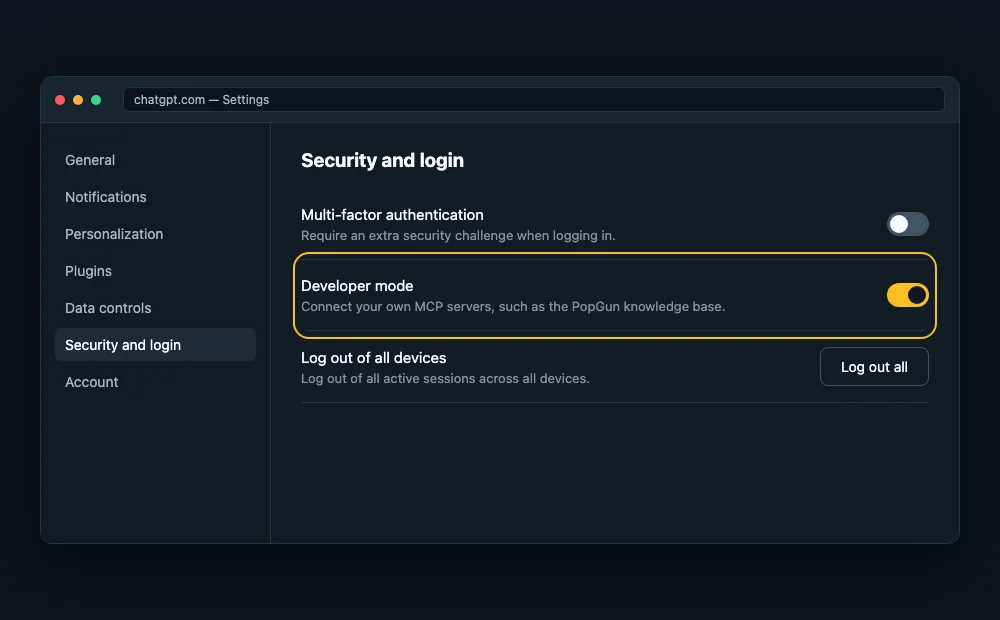
- On chatgpt.com, open Settings > Security and login and turn on Developer mode.
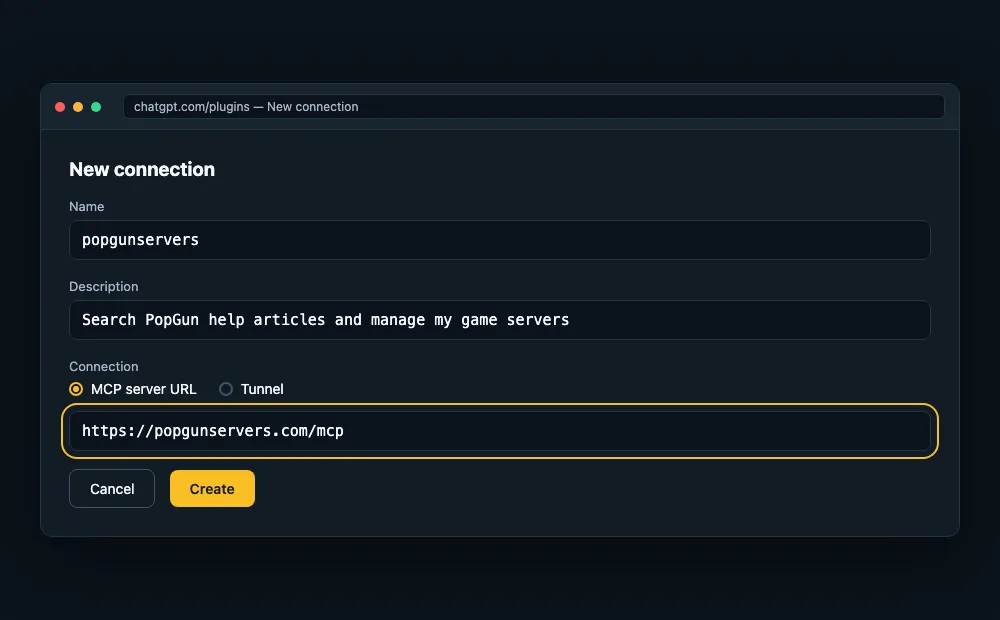
- Go to chatgpt.com/plugins and click the + button to create a new connection.
- Enter a name (e.g. "popgunservers") and a short description, choose MCP server URL as the connection and paste the server URL below, then click Create.
- ChatGPT opens the PopGun login page. Sign in and approve access (see the sign-in step above); read-only is the default.
- Review the tools ChatGPT discovered, then start a new chat, click + in the composer, pick popgunservers and ask about your game server or account.
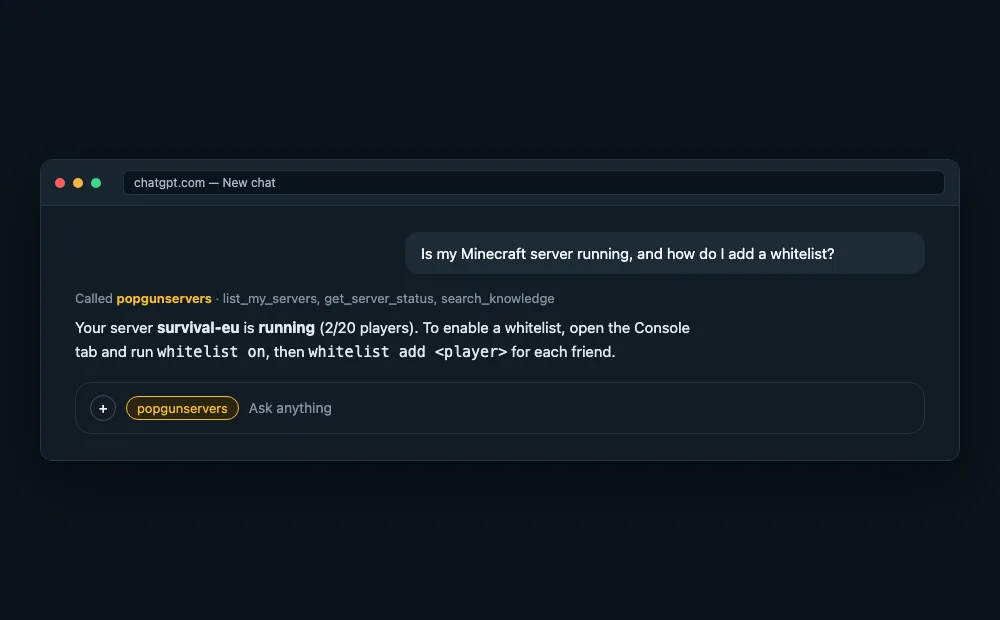
Verified against OpenAI Developers - Connect from ChatGPT.
Consumer app
Custom connectors require a paid Claude plan (Pro, Max, Team or Enterprise) - not available on the free plan.
- In Claude, click the + icon under the prompt box, then choose Add connector.
- Select Add custom connector at the bottom of the directory.
- Enter a name and paste the server URL below, then click Add.
- Claude opens a browser window asking you to log in to your PopGun account and approve access - this happens automatically because the server requires sign-in (see the sign-in step above).
- Enable the connector for the chat and ask a question about your game server or account.
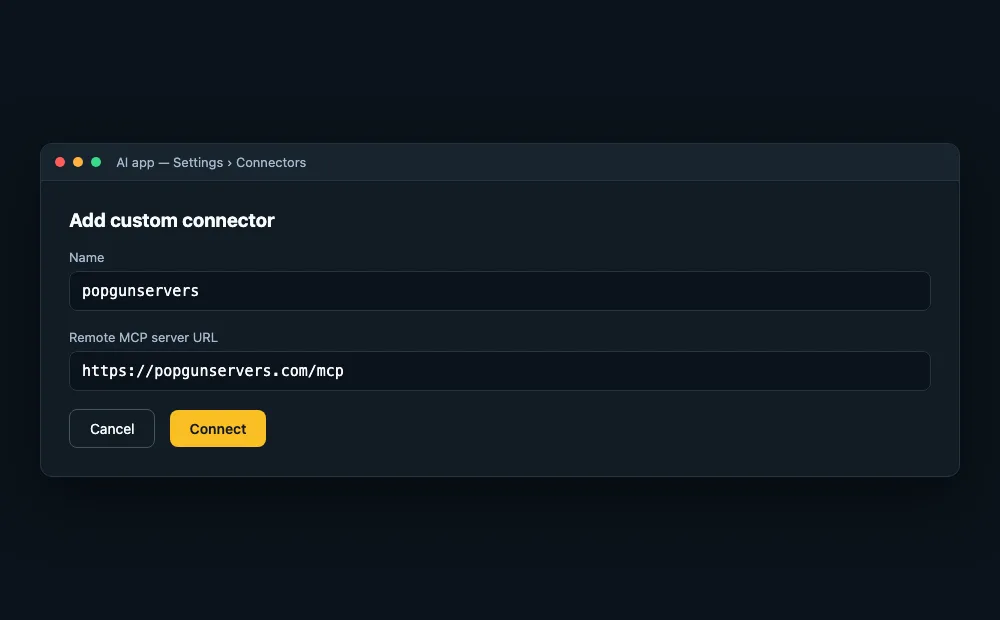
Verified against Claude Help Center - Custom connectors.
CLI
Available on any Claude Code install (API key or Claude subscription login).
- Open a terminal in any project directory.
- Run: claude mcp add --transport http popgunservers https://popgunservers.com/mcp - this only saves the config; no browser opens yet.
- Run claude mcp list - it shows "! Needs authentication" until you sign in.
- Start Claude Code, run /mcp, and select popgunservers to open a browser window and log in to your PopGun account and approve access.
- Ask Claude Code to search the knowledge base.
{
  "mcpServers": {
    "popgunservers": {
      "type": "http",
      "url": "https://popgunservers.com/mcp"
    }
  }
}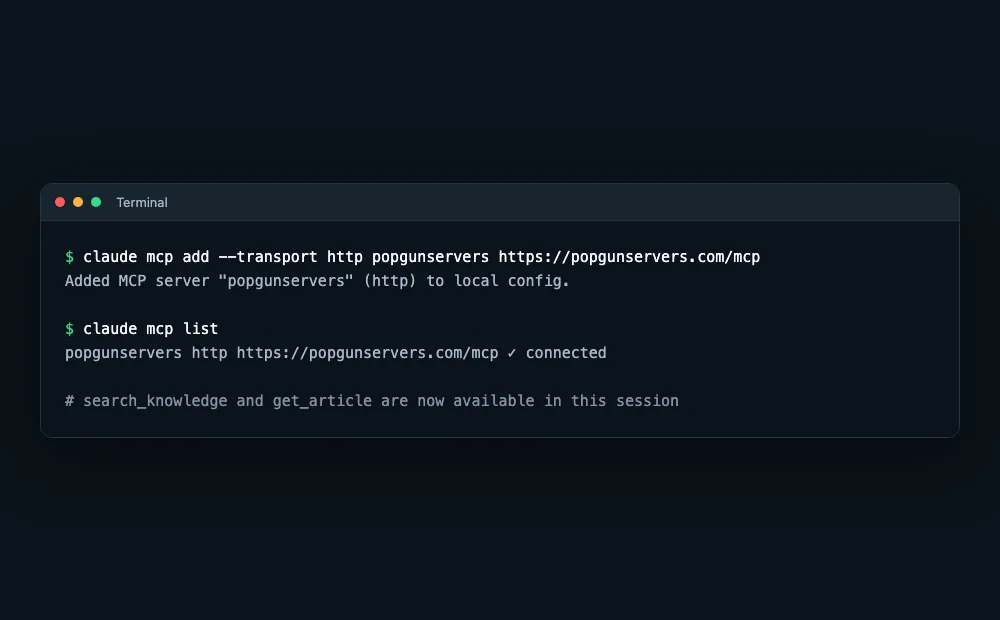
Verified against Claude Code docs - Connect to MCP tools.
CLI
Works on any Codex CLI install; the same config is shared with the ChatGPT desktop app's MCP settings and the Codex IDE extension.
- Open ~/.codex/config.toml (or a project-scoped .codex/config.toml).
- Add a [mcp_servers.popgunservers] table with the url below (auth defaults to oauth).
- Run codex mcp login popgunservers - a browser window opens to log in to your PopGun account and approve access.
- Run codex mcp list to confirm the server connected.
[mcp_servers.popgunservers]
url = "https://popgunservers.com/mcp"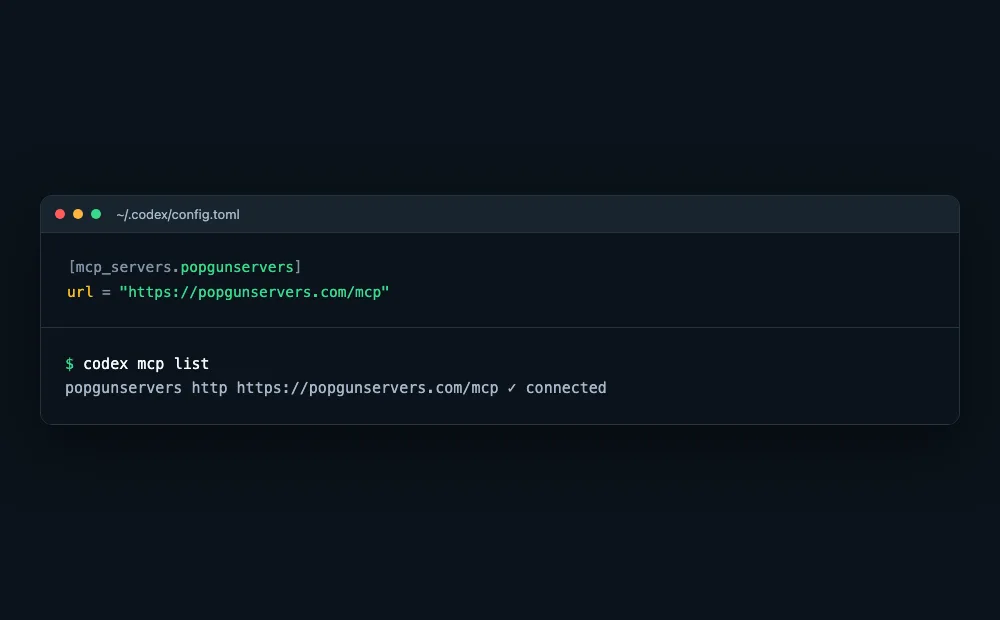
Verified against OpenAI Developers - MCP.
CLI
Works on any GitHub Copilot plan, including Copilot Free.
- Open a terminal in any directory.
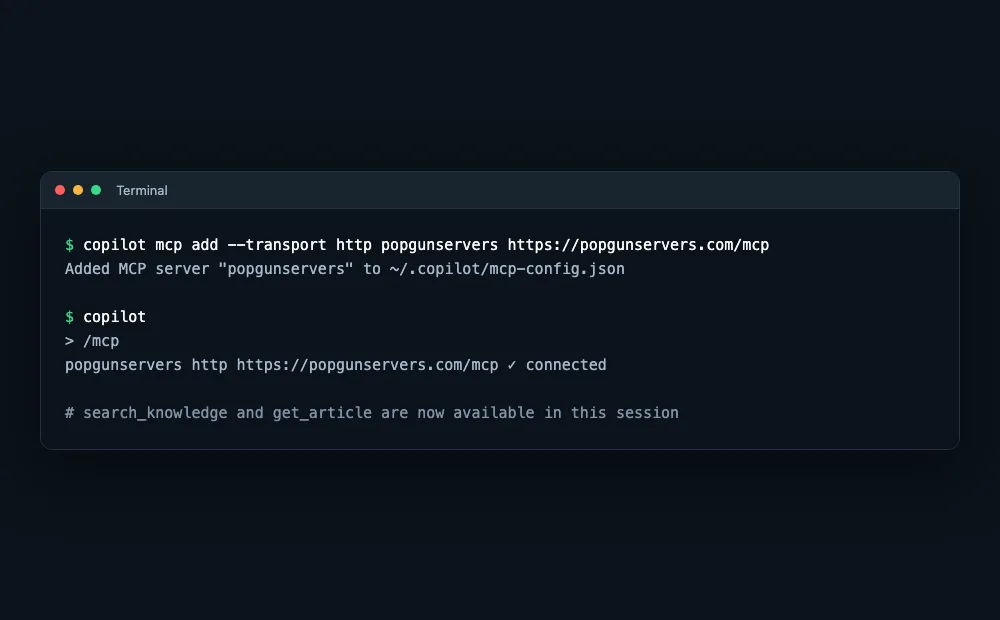
- Run: copilot mcp add --transport http popgunservers https://popgunservers.com/mcp - this only saves the config; no browser opens yet.
- Start copilot and run /mcp - on first use a browser window opens to log in to your PopGun account and approve access.
- Run /mcp again to confirm popgunservers is connected, then ask Copilot to search the knowledge base.
{
  "mcpServers": {
    "popgunservers": {
      "type": "http",
      "url": "https://popgunservers.com/mcp",
      "tools": ["*"]
    }
  }
}
Verified against GitHub Docs - Adding MCP servers for Copilot CLI.
CLI
Free to use with a Google account; this is also the recommended option for Grok or other consumer apps that cannot add a custom MCP server directly (see note below).
- Open ~/.gemini/settings.json (or your project's .gemini/settings.json).
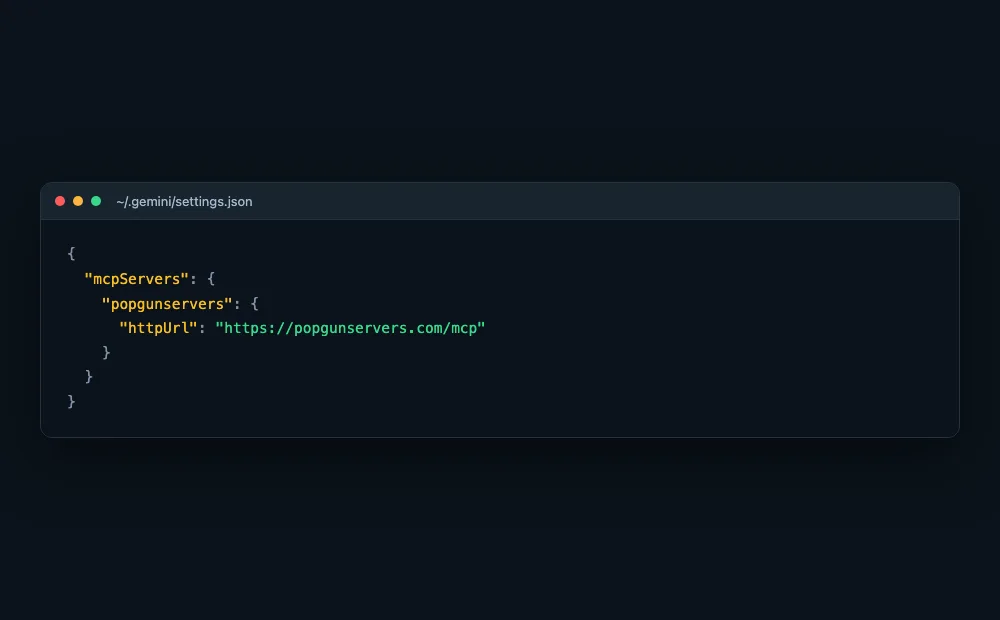
- Add an mcpServers entry for popgunservers using httpUrl, as shown below (no oauth block needed - it is discovered automatically).
- Restart Gemini CLI and run /mcp - on first use a browser window opens to log in to your PopGun account and approve access.
- Run /mcp again to confirm the server is connected.
{
  "mcpServers": {
    "popgunservers": {
      "httpUrl": "https://popgunservers.com/mcp"
    }
  }
}
Verified against Gemini CLI docs - MCP servers.
CLI
Free and open source; works with any model provider configured in OpenCode, including OpenRouter.
- Run opencode mcp add popgunservers --url https://popgunservers.com/mcp (add --global to use it in every project), or add the server to opencode.jsonc as shown below.
- Run opencode mcp auth popgunservers (or /mcps in OpenCode, then select the server) - a browser window opens to log in to your PopGun account and approve access.
- Run opencode mcp list to confirm the server is connected, then ask OpenCode to use the popgunservers tools.
- OpenCode V1 only: place popgunservers directly under mcp instead of mcp.servers.
{
  "$schema": "https://opencode.ai/config.json",
  "mcp": {
    "servers": {
      "popgunservers": {
        "type": "remote",
        "url": "https://popgunservers.com/mcp"
      }
    }
  }
}
Verified against OpenCode docs - MCP servers.
CLI / desktop agent
Free and open source from Nous Research; MCP support ships with the standard install and works with any configured model provider, including OpenRouter.
- Open ~/.hermes/config.yaml.
- Add a popgunservers entry under mcp_servers with the url below and auth: oauth.
- Run hermes mcp login popgunservers - a browser window opens to log in to your PopGun account and approve access.
- Start a new Hermes session (or run /reload-mcp) and ask Hermes to use the popgunservers tools.
mcp_servers:
  popgunservers:
    url: "https://popgunservers.com/mcp"
    auth: oauth
Verified against Hermes Agent docs - MCP.
Self-hosted agent
Free and open source; adding MCP servers requires administrator access to your OpenClaw Gateway. Works with any configured model provider, including OpenRouter.
- Open the OpenClaw Control UI and go to Settings > MCP, then select Add server.
- Name it popgunservers, choose the Streamable HTTP transport, paste the server URL below and select Add server.
- Select Sign in on the popgunservers row (or run openclaw mcp login popgunservers on the Gateway host) - a browser window opens to log in to your PopGun account and approve access.
- Run openclaw mcp doctor popgunservers --probe to confirm the tools are listed.
{
  mcp: {
    servers: {
      popgunservers: {
        url: "https://popgunservers.com/mcp",
        transport: "streamable-http",
        auth: "oauth",
        enabled: true,
      },
    },
  },
}
Verified against OpenClaw docs - Connect MCP servers.
Not supported yet - cannot add a custom MCP server yet
The consumer grok.com / X app does not let ordinary users add a custom remote MCP server. The xAI developer API's remote MCP tools need a static bearer token, which PopGun does not yet let users create through self-service, so Grok cannot connect today.
- Grok cannot be pointed at a custom knowledge base from the consumer app or the xAI developer API today.
- For a chat-style assistant without writing code, use Gemini CLI, Claude or ChatGPT instead - they sign in with your PopGun account directly.
Verified against xAI docs - Remote MCP Tools.
Model provider - cannot add a custom MCP server yet
OpenRouter routes requests to many AI models, but its chat and API cannot connect to a custom remote MCP server - tool calls are executed by the client app. Use an OpenRouter model inside an agent that supports MCP instead.
- Create an OpenRouter API key and add it as the model provider in OpenCode, Hermes Agent or OpenClaw.
- Add the PopGun MCP server in that agent by following its tab on this page.
- Pick any OpenRouter model that supports tool calling, sign in to PopGun when the browser opens and approve access.
Verified against OpenRouter docs - Tool calling.
IDE
Works on any Cursor plan.
- Open Cursor Settings > MCP, or create an mcp.json file in your project or home directory.
- Add a popgunservers entry with the url below (no auth object is needed - OAuth is discovered automatically).
- Reopen the MCP settings panel and select Authenticate - a browser window opens to log in to your PopGun account and approve access.
- Confirm the server shows as connected.
{
  "mcpServers": {
    "popgunservers": {
      "url": "https://popgunservers.com/mcp"
    }
  }
}
Verified against Cursor docs - Model Context Protocol.
IDE
Requires the GitHub Copilot Chat extension; works on any Copilot plan that has agent mode.
- Create or open .vscode/mcp.json in your workspace (or run MCP: Add Server from the Command Palette).
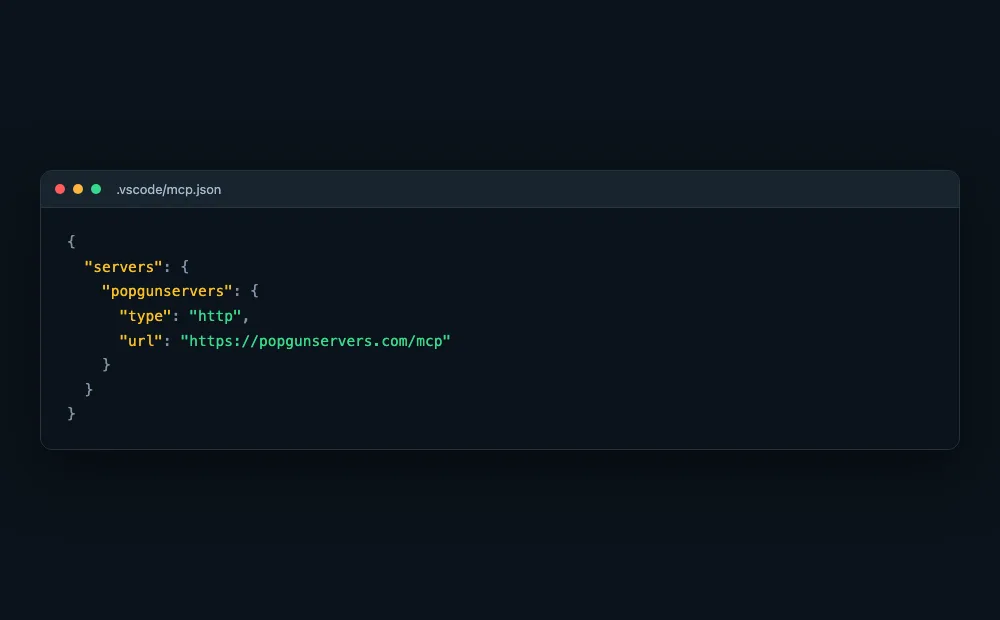
- Add a popgunservers server with type http and the url below.
- Save the file, then select Authenticate when prompted - a browser window opens to log in to your PopGun account and approve access.
- VS Code then discovers the tools automatically and lists them in the chat's tool picker.
{
  "servers": {
    "popgunservers": {
      "type": "http",
      "url": "https://popgunservers.com/mcp"
    }
  }
}
Verified against VS Code docs - Add and manage MCP servers.
IDE
Works in IntelliJ IDEA, PyCharm, GoLand, WebStorm, Rider and other JetBrains IDEs with the latest GitHub Copilot plugin, on any Copilot plan that has agent mode.
- Click the GitHub Copilot icon in the lower right corner and select Open Chat.
- Switch the chat to Agent mode, click the tools icon (Configure your MCP server) at the bottom of the chat, then click Add MCP Tools.
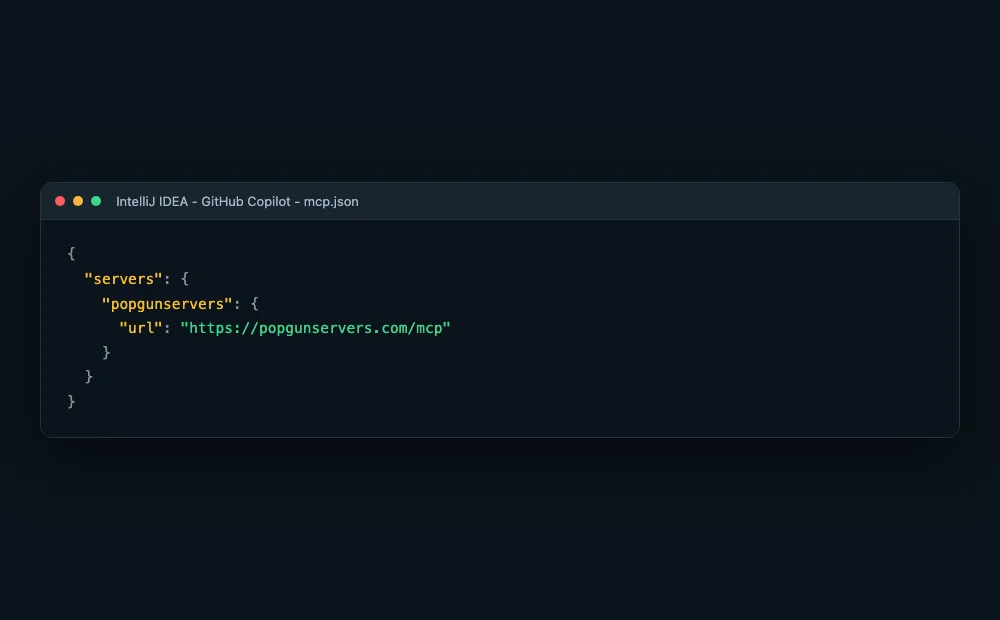
- In the mcp.json file that opens, add a popgunservers server with the url below and save it.
- When prompted, sign in - a browser window opens to log in to your PopGun account and approve access.
- Click the tools icon again to confirm the popgunservers tools are listed.
{
  "servers": {
    "popgunservers": {
      "url": "https://popgunservers.com/mcp"
    }
  }
}
Verified against GitHub Docs - Extending Copilot Chat with MCP (JetBrains).
Advanced: how the OAuth connection works
Claude Code, Codex CLI, GitHub Copilot CLI, Gemini CLI, OpenCode, Hermes Agent, OpenClaw, Cursor and VS Code all discover the login
flow automatically: they read the protected-resource and authorization-server
metadata the server publishes, register themselves with
POST https://popgunservers.com/oauth/register, then open your browser to sign in and
approve access - no manual token or secret is ever typed into the client.
To build or test your own client, run through the same flow with curl: register a
client, open the authorize URL in a signed-in browser with your own PKCE
code_challenge, then exchange the returned code for a token.
curl -s -X POST https://popgunservers.com/oauth/register \
  -H "Content-Type: application/json" \
  -d '{"client_name":"My MCP Client","redirect_uris":["http://127.0.0.1:8765/callback"]}'
# Open in a browser where you are already logged in to PopGun:
https://popgunservers.com/oauth/authorize?client_id=<id>&redirect_uri=http://127.0.0.1:8765/callback&response_type=code&code_challenge=<challenge>&code_challenge_method=S256curl -s -X POST https://popgunservers.com/oauth/token \
-d 'grant_type=authorization_code&client_id=<id>&code=<code>&redirect_uri=http://127.0.0.1:8765/callback&code_verifier=<verifier>'
The access granted - knowledge:read servers:read by default, plus
servers:write only if you choose a role with write permissions on the consent screen. Roles are your built-in or custom account roles, limited to your own permissions; the server decides the access from your consent decision and the client cannot request a different scope, including when refreshing the token.
Write tools follow the role permissions, including the separate server.files, server.console and server.packages permissions.
On the consent screen you can also limit write access to selected servers; all other servers stay read-only for that client.
Destructive tools always need a one-time approval. The first call returns an error result with approval_required and an approval_id in its structured content. Approve it in Account settings → Connected AI apps, then repeat the same call with the approval_id argument added. An approval is valid for 10 minutes and for that exact call only.
Existing PopGun account API keys are also accepted as a Bearer token on this endpoint and always get read-only access, but the self-service page to create one is not available yet - use the OAuth flow above in the meantime. Manage, downgrade to read-only, or revoke connected AI apps from Account > Connected AI apps.
Advanced: test the protocol with curl
Initialize a session and list the available tools directly over HTTP (replace the token with an OAuth access token obtained via the flow above, or an existing account API key):
curl -s https://popgunservers.com/mcp \
  -H "Authorization: Bearer <token>" \
  -H "Content-Type: application/json" \
  -d '{"jsonrpc":"2.0","id":1,"method":"initialize","params":{"protocolVersion":"2025-06-18","capabilities":{},"clientInfo":{"name":"curl","version":"1.0"}}}'
curl -s https://popgunservers.com/mcp \
-H "Authorization: Bearer <token>" \
-H "Content-Type: application/json" \
-d '{"jsonrpc":"2.0","id":2,"method":"tools/list"}'The server implements MCP's Streamable HTTP transport (spec 2025-06-18) with JSON responses only - no Server-Sent Events, no session cookies, no batch requests. Any MCP-compliant client that supports HTTP (not only stdio) can connect with just the URL above.